
Avoid Repeated Shaving Irritation: Common Head Shaver Mistakes and How to Fix Them

Using a Head Shaver to shave your head or trim hair can seem straightforward, but many users fall into a common mistake: thinking, “Shave multiple times for a cleaner result.” Repeatedly shaving the same area not only fails to improve smoothness but can also cause redness, irritation, or even small cuts. High-frequency use can also wear out the blades faster. This guide helps you self-check common shaving errors and master “one-pass clean shaving,” protecting both your skin and your Head Shaver.
1. Why Repeated Shaving Harms Your Skin and Device
Whether using a Head Shaver for your scalp or a traditional razor for your face, shaving the same area repeatedly has consequences far beyond “not clean enough”:
Skin Barrier Damage: Scalp skin is thinner than facial skin. Repeated friction from the blades can damage the protective layer, causing redness, dryness, flaking, or irritation. Sensitive skin may experience stinging or itching.
Blade Wear: Head Shaver blades, including Head Shaver replacement blades, are designed for single-pass efficiency. Repeated shaving causes excessive friction against hair and skin, dulling the blade faster. A blade meant to last six months may require replacement in just three.
Increased Infection Risk: Tiny, often invisible cuts can worsen with repeated passes, allowing bacteria to enter and cause folliculitis. This is particularly likely during hot, sweaty summer months.
The myth that “repeated shaving equals cleaner results” is false. Using proper technique allows even beginners to achieve a smooth shave in one pass without irritation.
2. Three Common Shaving Mistakes to Self-Check
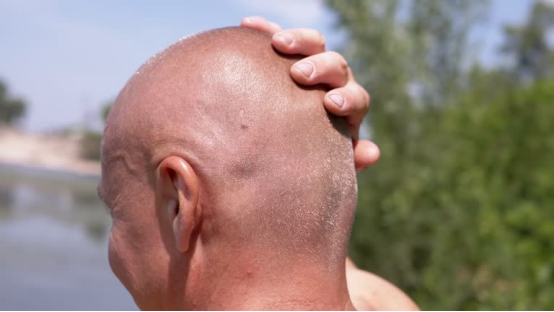
Based on user feedback, these are the core mistakes that often lead to repeated shaving:
Mistake 1: Circular Shaving Motion in the Same Area
What it looks like: Moving the Head Shaver in clockwise and counterclockwise circles over the top or back of the head.
Problem: Hair grows in different directions on the scalp. Circular motion frequently goes against the hair grain, leaving missed spots and irritating follicles.
Self-Check: If your wrist frequently twists or the shaver stays in the same spot for more than 3 seconds, you are using circular motion incorrectly.
Mistake 2: Pressing Too Hard
What it looks like: Pressing the Head Shaver firmly to get every hair in one pass, especially in thick hair areas.
Problem: Most Head Shaver models, including Head Shaver Classic, are designed with floating heads that naturally adapt to the scalp. Excessive pressure bends hair, reduces efficiency, and increases irritation.
Self-Check: After shaving, feel for red marks or warmth on the scalp. A gentle, light contact is sufficient.
Mistake 3: Shaving Without Following Hair Direction
What it looks like: Randomly moving across the scalp, starting with the back, then the top, or switching directions mid-pass.
Problem: Hair grows in specific directions (e.g., front-to-back, top-to-bottom, left-to-right). Shaving without order leads to missed spots, requiring repeated passes over the same area.
Self-Check: Run your fingers over the scalp. Rough or uneven hair indicates unorganized shaving and unnecessary repetition.
3. Correct Technique: One-Pass Shaving Steps
Mastering proper technique ensures a smooth, irritation-free shave:
Step 1: Prep Hair and Scalp
Clean and Dry: Wash your scalp with warm water and mild, silicone-free shampoo if oily. Dry completely.
Trim Longer Hair: Hair longer than 5 mm should be trimmed to 2–3 mm before shaving to prevent blade jamming.
Choose the Right Blade: Match blade type to hair texture. For coarse hair, use Head Shaver replacement blades—strong version; for fine hair, choose the gentle version.
Step 2: Shave by Sections, Following Hair Growth
Divide the scalp into four zones: forehead, top, sides, and back, shaving each in a single direction without backtracking:
Forehead to Top: Move from hairline backward, following hair direction. Only one pass per area.
Sides: Start from temples, and move along the hair direction toward the ears. Ensure contour coverage.
Back: From neckline upward to crown, using a mirror or hand guide. Slow and steady; avoid repeated passes.
Tip: For minor missed hairs, adjust the blade direction from an adjacent section rather than directly returning over the same spot.
Step 3: Post-Shave Care
Gentle Cleaning: Rinse scalp with cool water to close pores. Avoid hot water. Apply fragrance-free moisturizer if sensitive.
Blade Maintenance: Rinse the blade of residual hair and allow it to dry before reinstalling.
Replace Blades Regularly: Swap Head Shaver blades every 3–6 months. Dull blades lead to repeated shaving and skin irritation.
4. Extra Tips to Avoid Repeated Shaving
Clean the Blade: Residual hair can jam the shaver, reducing efficiency. Always clean and dry after use.
Ensure Adequate Power: Low battery (<20%) slows blade rotation and increases missed spots. Charge fully before use.
Match Device to Hair Type: Avoid using a women’s head shaver on thick, coarse hair or basic models on dense hair. Check bestskullshaver.com/shop for recommended models.
Technique Over Repetition
Preventing irritation is less about reducing passes and more about correct technique and proper equipment. Self-check for the three common mistakes—circular motion, excessive pressure, and unorganized shaving—and follow a sectioned, single-direction approach. Paired with the right Head Shaver model and replacement blades, you can achieve a smooth, safe, one-pass shave while prolonging device life.