
ROUNDRY GUIDE
QUICK ANSWER
After each use, turn the shaver off, remove loose clippings and clean only the parts the manual allows you to open or rinse. Let washable parts dry completely before reassembly, storage or charging. Deep-clean when sound, heat, smell or cutting performance changes—not only on a fixed calendar.
How to clean an electric head shaver depends on the exact construction. Some complete units are washable, some have a rinseable removable head and some require dry brushing only. The correct routine begins with the manual, not with a faucet.
Cleaning protects the long-term ownership described on the replacement heads and blades page. It also helps separate a maintenance problem from a worn-part problem.
Identify the Water Boundary Before Cleaning
| Label or design | What it may mean | What still needs confirmation |
|---|---|---|
| Dry-use shaver | Brush or tap out loose debris | Whether any removable part can be rinsed separately |
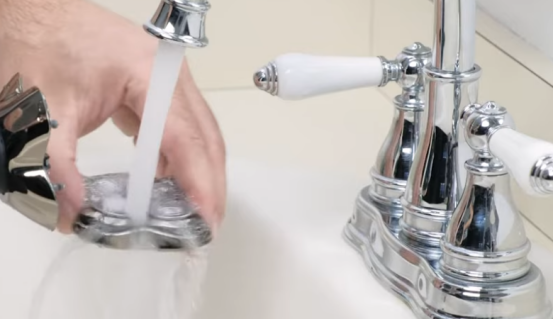
| Washable head | The detached head may be rinsed | Whether the body, motor area or charging port can contact water |
| Wet & Dry shaver | The device supports specified wet use | Submersion depth, cleaning product, drying and charging rules |
| Waterproof claim | May refer to a tested ingress level | The exact IP rating and limitations stated by the manufacturer |
Never assume that a removable magnetic or snap-on head makes the entire shaver washable. Keep charging contacts and ports dry unless the instructions explicitly state otherwise.
The Two-Minute After-Use Cleaning Routine
- Power off and disconnect. Never clean while charging.
- Remove the head as instructed. Do not pry parts that are not designed for user removal.
- Empty loose clippings. Hold the assembly over a bin or sink and tap gently—do not strike a thin foil.
- Brush dry areas. Use the supplied brush or a soft clean brush on approved surfaces.
- Rinse only approved parts. Use the water temperature and method stated in the manual.
- Shake off excess water gently. Avoid bending foil or losing small rings and cutters.
- Air-dry open. Place parts on a clean towel with airflow; do not close a damp chamber.
Deep Cleaning: When the Quick Routine Is Not Enough
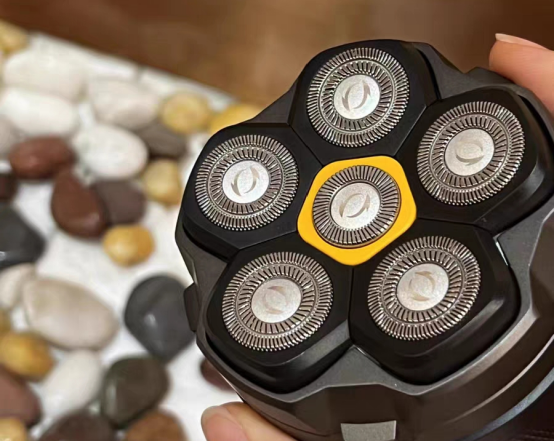
A deeper clean is useful when clippings remain behind cutters, wet residue dries in corners, the motor sound becomes uneven or the head develops an odor. Work over a clear surface and arrange parts in removal order. Rotary cutters can be paired with individual chambers; mixing them may affect fit on some designs.
Do not improvise with harsh cleaning methods
- Do not scrape a foil or cutter with metal tools.
- Do not use bleach, household solvent or abrasive paste unless the manufacturer explicitly approves it.
- Do not use compressed air so forcefully that small parts move or moisture enters the body.
- Do not use a dishwasher, boiling water or a hair dryer.
- Do not oil the head unless the manual specifies the oil and location.
How Often Should You Clean a Head Shaver?
Remove loose clippings after every use. The need for rinsing or deeper cleaning depends on shaving frequency, dry versus wet use, hair density and the head design. A daily dry user may empty the chamber every session and deep-clean weekly. A wet-shave user should remove sticky residue immediately before it dries.
The schedule should tighten when:
- The motor sound changes under normal growth.
- The head warms faster than usual.
- Hair begins pulling despite appropriate starting length.
- Visible debris remains after the normal routine.
- A wet product or skin oil forms residue around cutters.
Drying Is Part of Cleaning
A part is not clean-and-ready merely because water stopped dripping. Open the assembly and allow airflow to reach internal surfaces. Keep the cover off until the head is fully dry. Store the shaver away from constant shower humidity when possible. Charge only after the device and charging area meet the manufacturer’s drying requirements.
Inspect While the Head Is Open
Cleaning is the best time to look for wear:
- Dents, cracks or holes in a foil or guard
- Loose magnetic or snap connections
- Missing seals, rings or spacers
- Corrosion or residue near contacts
- Cutters that no longer rotate or seat evenly
If cleaning does not restore normal operation, use the replacement heads and blades guide to verify damage signs and compatibility. Add the detailed replacement-timing article here after it is live.
A Clean Shaver Can Still Be the Wrong Shaver
Cleaning does not correct hair that is too long, a cutting system you cannot guide or a damaged replacement part. Use maintenance as one diagnostic step. If the tool continues to pull after appropriate pre-trimming, charging, cleaning and reassembly, stop and inspect compatibility or contact support.
FAQ
Can I wash my electric head shaver under the tap?
Only when the exact model instructions allow it. A rinseable head does not automatically make the body or charging port washable.
Should I clean the shaver after every use?
Remove loose clippings after every use. Rinsing and deeper cleaning depend on the model and whether you shaved wet or dry.
Can I use alcohol to clean a shaver head?
Do not use alcohol or other chemicals unless the manufacturer approves them for the exact materials and cleaning method. Some plastics, seals and lubricants can be affected.
Why does my shaver smell after cleaning?
Residue or moisture may remain inside the head. Reopen approved parts, clean them according to the manual and allow full airflow. Replace damaged or contaminated parts when cleaning cannot restore them.
CLEAN, INSPECT, THEN DECIDE
Check Replacement Compatibility Before Ordering
If cleaning does not restore performance, verify the exact model and replacement-head interface.
Related Posts
Electric Razor Cleaning Brush: How to Use It Correctly
-
Posted by
 Ferris Qashri
A cleaning brush is best for loose, dry clippings in accessible areas. Use short outward strokes with the shaver off. Do not press into thin foil, force bristles through cutter openings or treat brushing as a substitute for the model-specific rinse and drying instructions.
When Should You Replace a Shaver Head?
-
Posted by
Ferris Qashri
Replace a shaver head when cleaning and correct technique no longer restore performance, or when the foil, guard, cutters or interface are damaged.